 I am so excited to announce that for the year 2016, I have been asked to be one of 3M Command’s brand ambassadors.
I will be showing you throughout the year, how I use the Command brand products creatively.
Here’s my first project reveal.
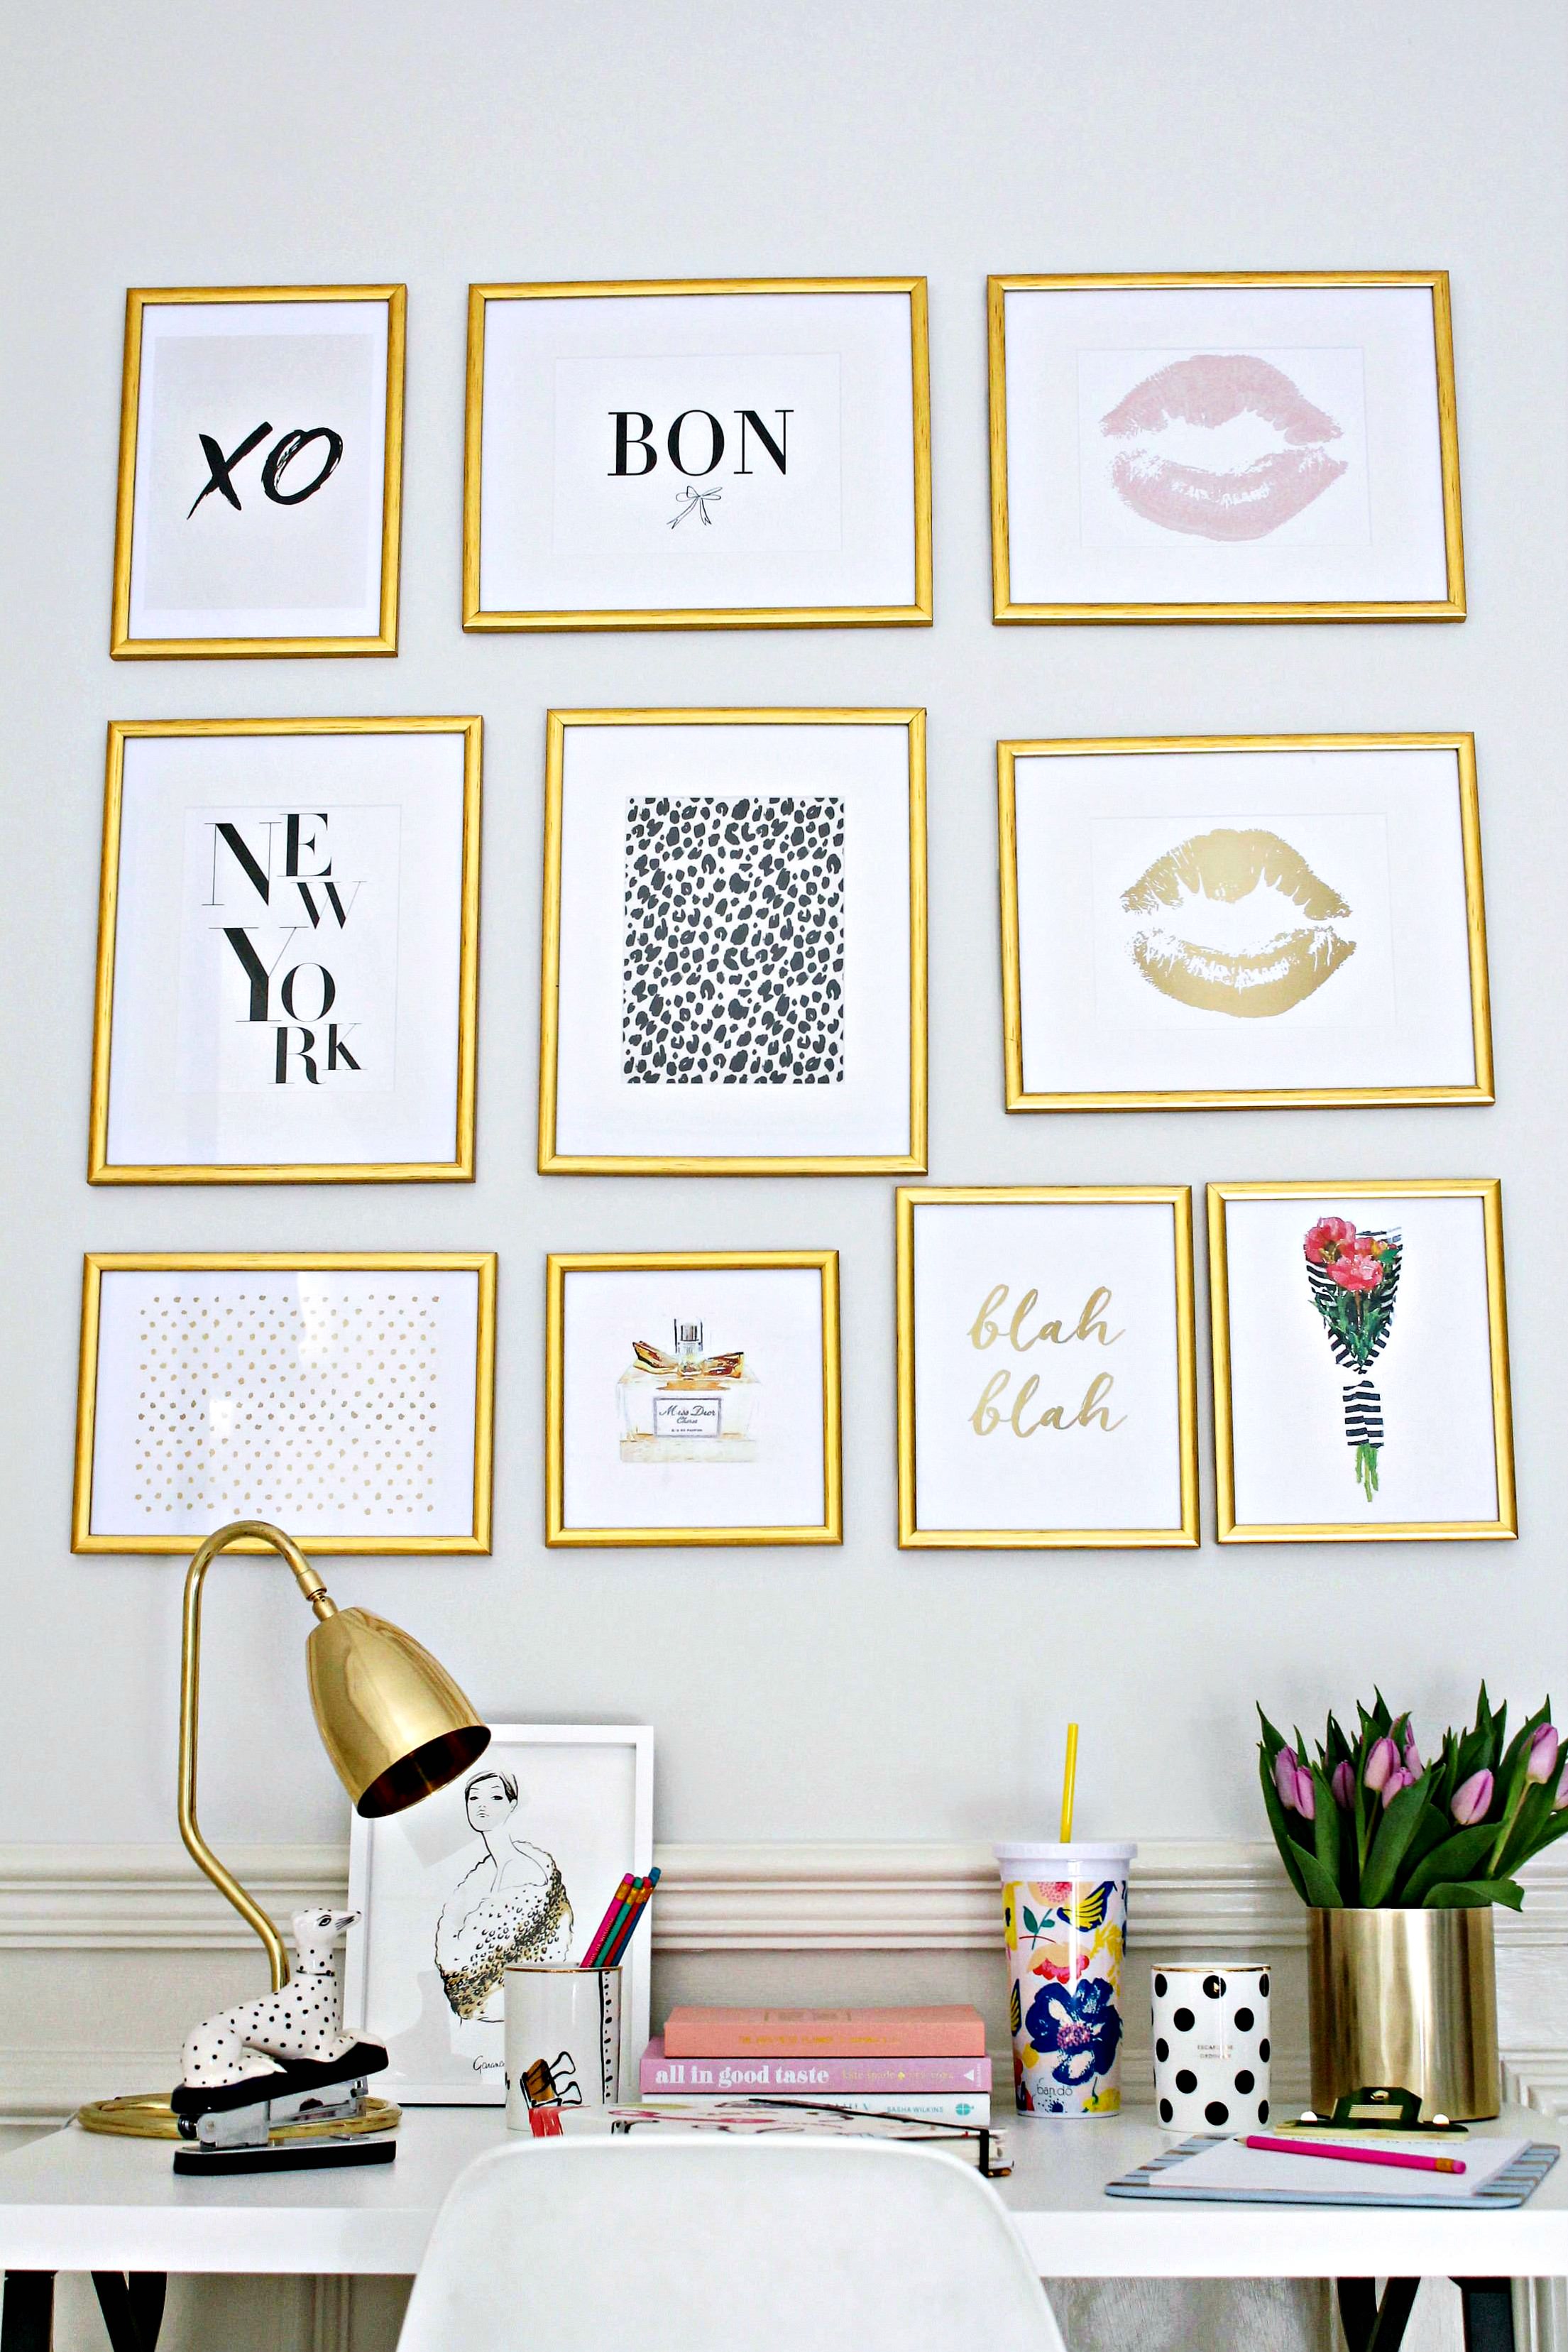
The creation of a gallery wall for a new workspace, shot on location, in Purley Hall, a stately family home in West Berkshire, England.
I used Command Picture Hanging strips here.
The most amazing thing is that I am able to show you how to create a gallery wall without hammer and nails. Even better, the strips could all be easily removed without damage to the walls.
No holes, no damage to walls! A total home owner or renters’ dream come true!
Keep on reading, there is a chance for you to win a whole set of these prints too.
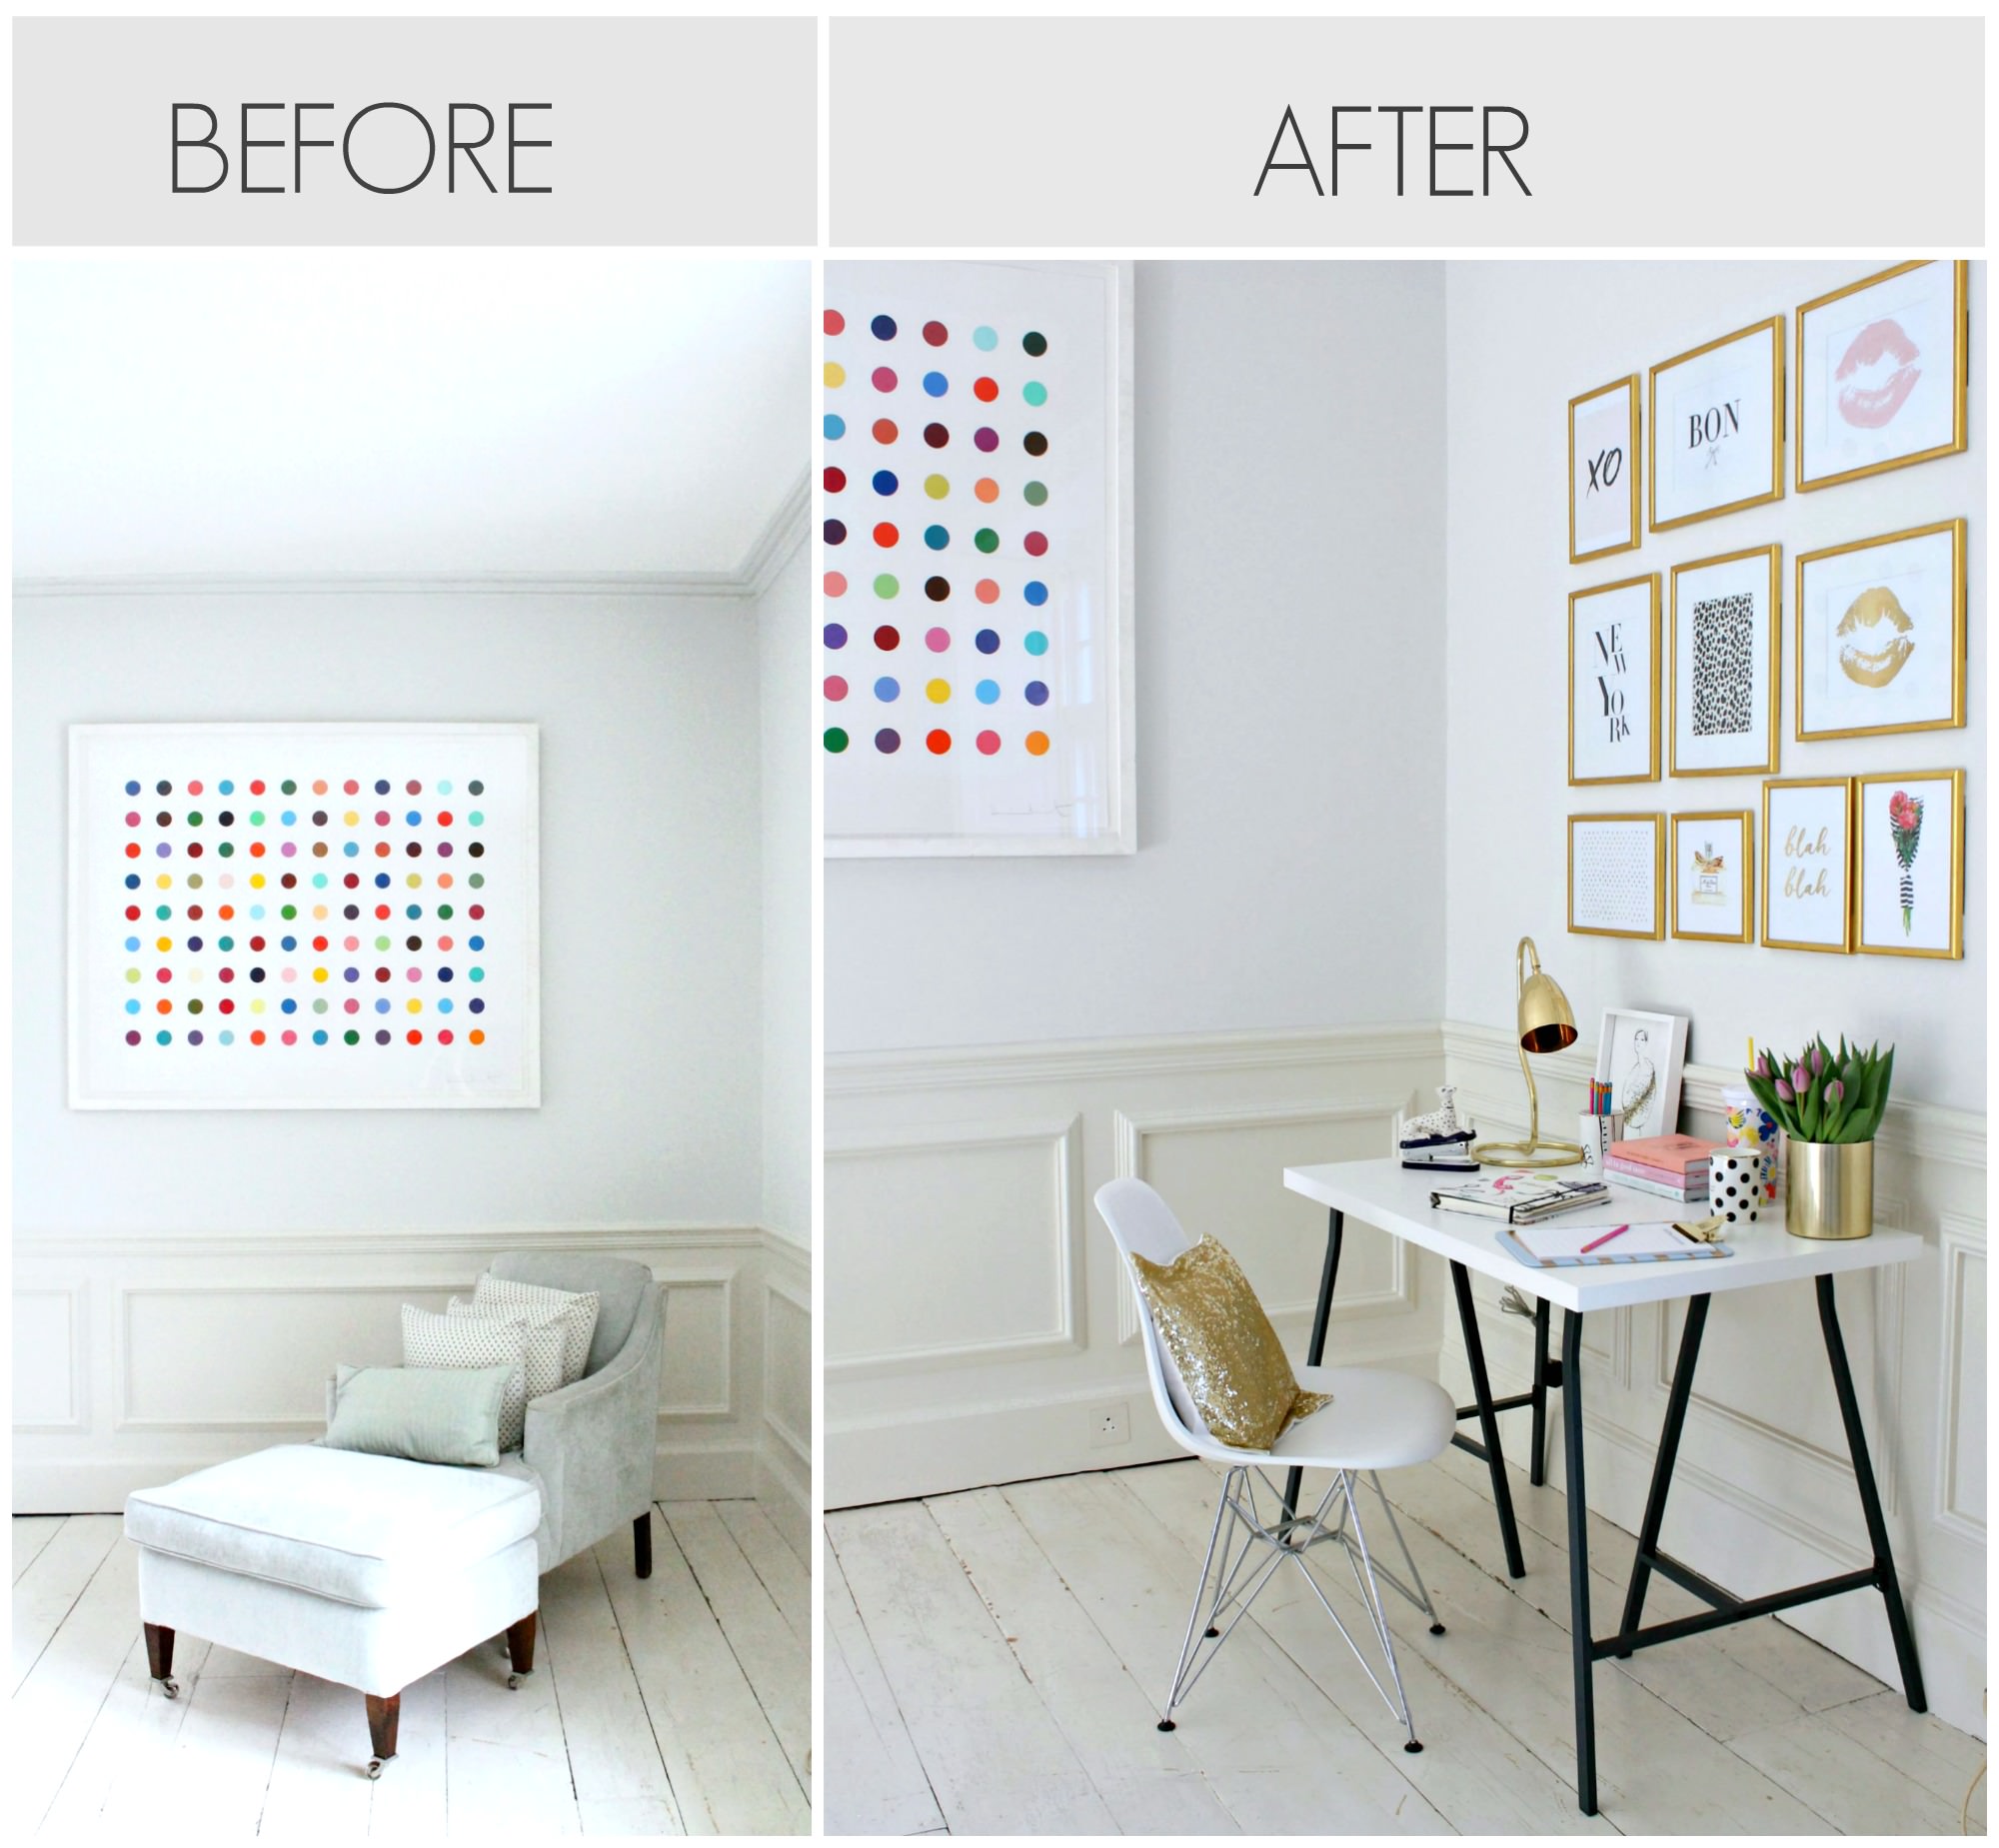 Here are the before and after photos. I’m in love with that colourful Damien Hirst dotted print.
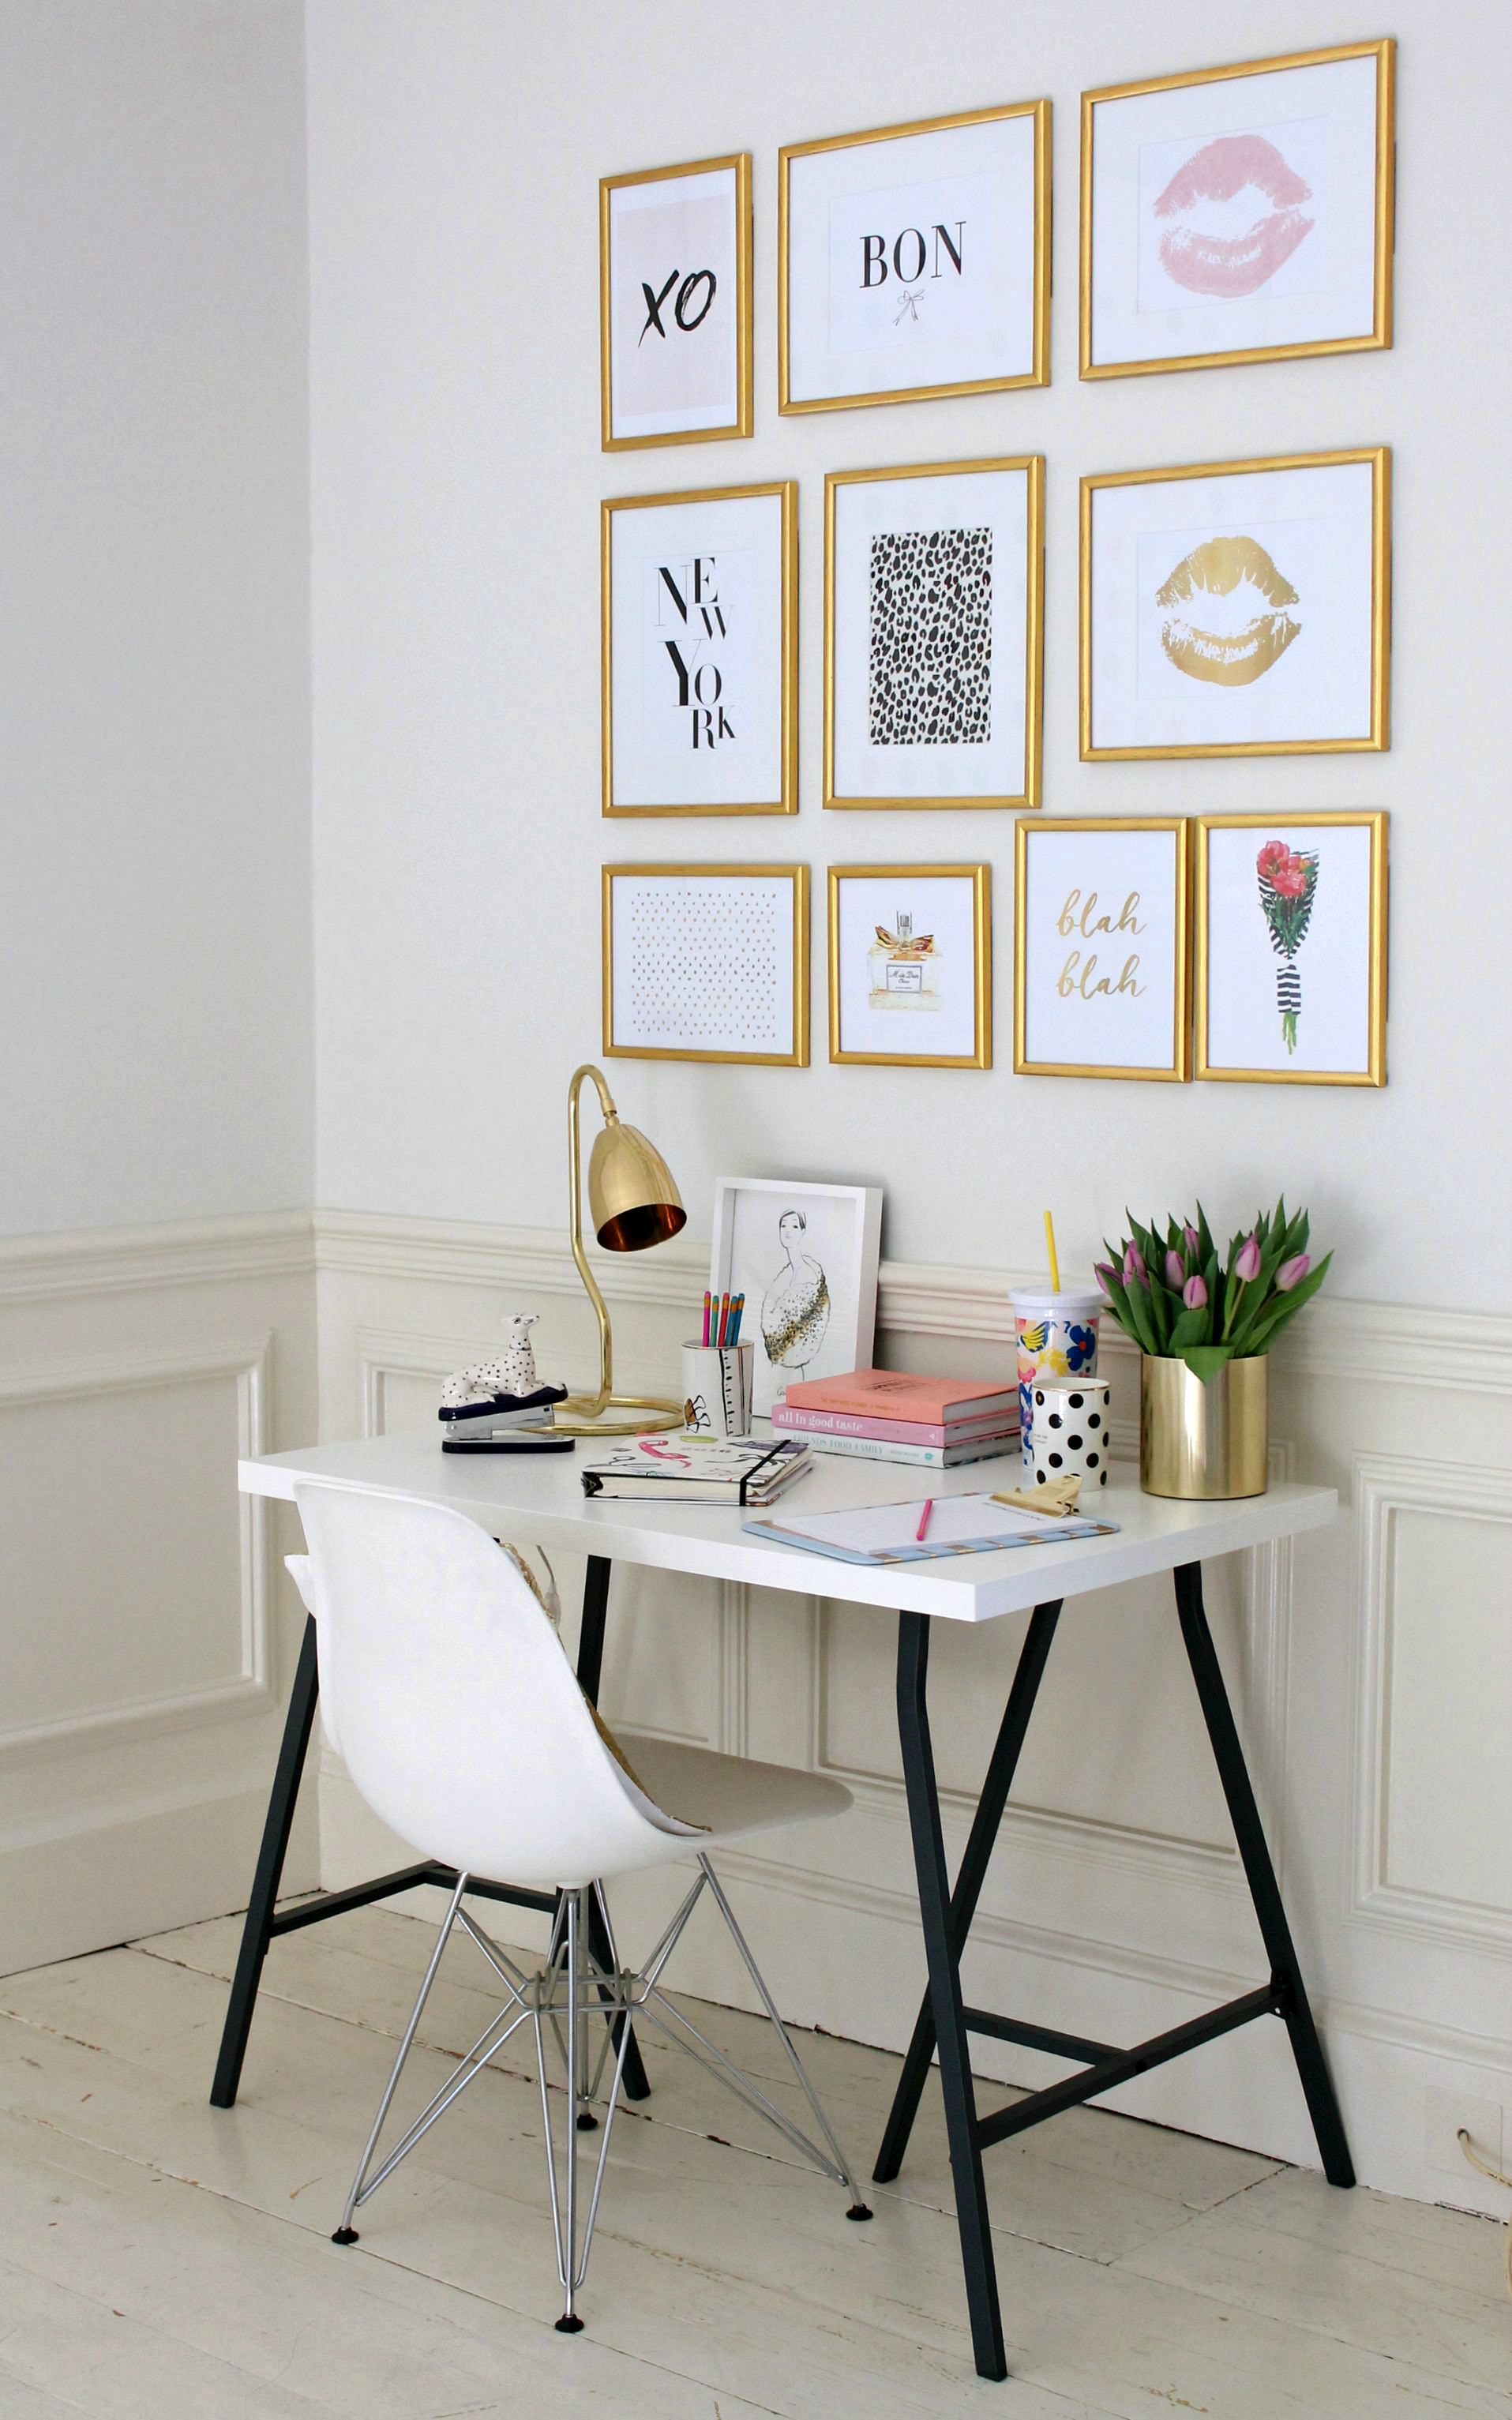 A closer look at my new workspace gallery. What do you think?
This was such a fun project. It took me less than an hour to create . Can you believe I didn’t use a spirit level to put the pictures up? Just the old fashion way of someone standing back and indicating to me if the print was at level. It helped that the Command strips made it easy for fine adjustment of the frames into position.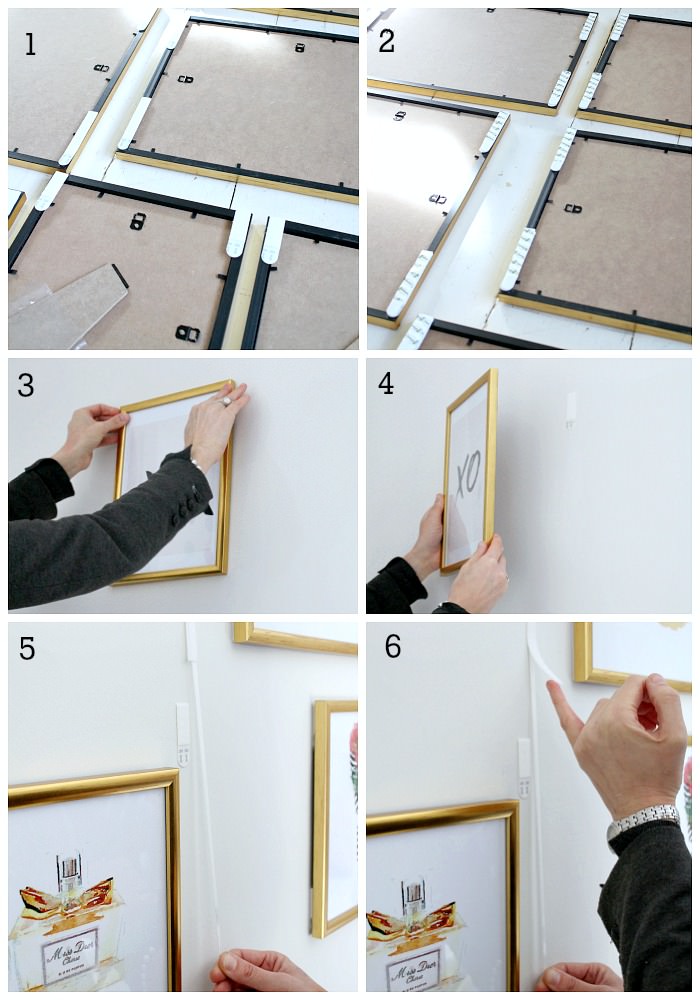 Depending on the size of the strips, they can hold up to 7.2kg in weight. Do check the weights of the frames before starting.
Before applying the strips to the wall, make sure the wall is clean and dust free. The strips can be used on any walls, except wallpapered walls.
Here’s the step by step guide on how to use the Command strips to put up the gallery wall:
Image 1+2 : Separate the strips. You could either stick the first set of the strips to the backs of the frame by removing the green liners ( I have used a combination of medium and narrow strips here) then press a new set of strips on top of those strips already stuck on the frame. As you press, make sure the strips ‘click’ together.
Or you could start by pressing two strips together till they click and then sticking one side of the pair to the back of the picture frame.
Either of those ways work well.
Image 3 : Remove the remaining green liners and press the frame onto the wall. Press each side of the frame firmly against the wall for at least 30 seconds.
Image 4 : To ensure the adhesive will hold, remove the frame by grabbing the bottom corners and peeling the frame up and away from the wall. Do not pull straight off. Now, press the entire strips that have remained on the wall for at least another 30 seconds.
The most important point to note is that the strips need to be left on the wall for at least 1 hour before reattaching the frame.
Image 5+6 : All about removal of the strips.
After removing the frame ( remember to remove by grabbing the bottom corners and peeling the frame up and away from the wall rather than pulling straight off), you can then remove the strips.
Never pull the strips towards you or peel from the wall. Always pull straight down, keeping your hand against the wall as you go, pull as slow as you can, like in the image above.
Keep stretching up to 15 inches and the strip will just naturally pop off. The last image shows you what is happening behind the strip.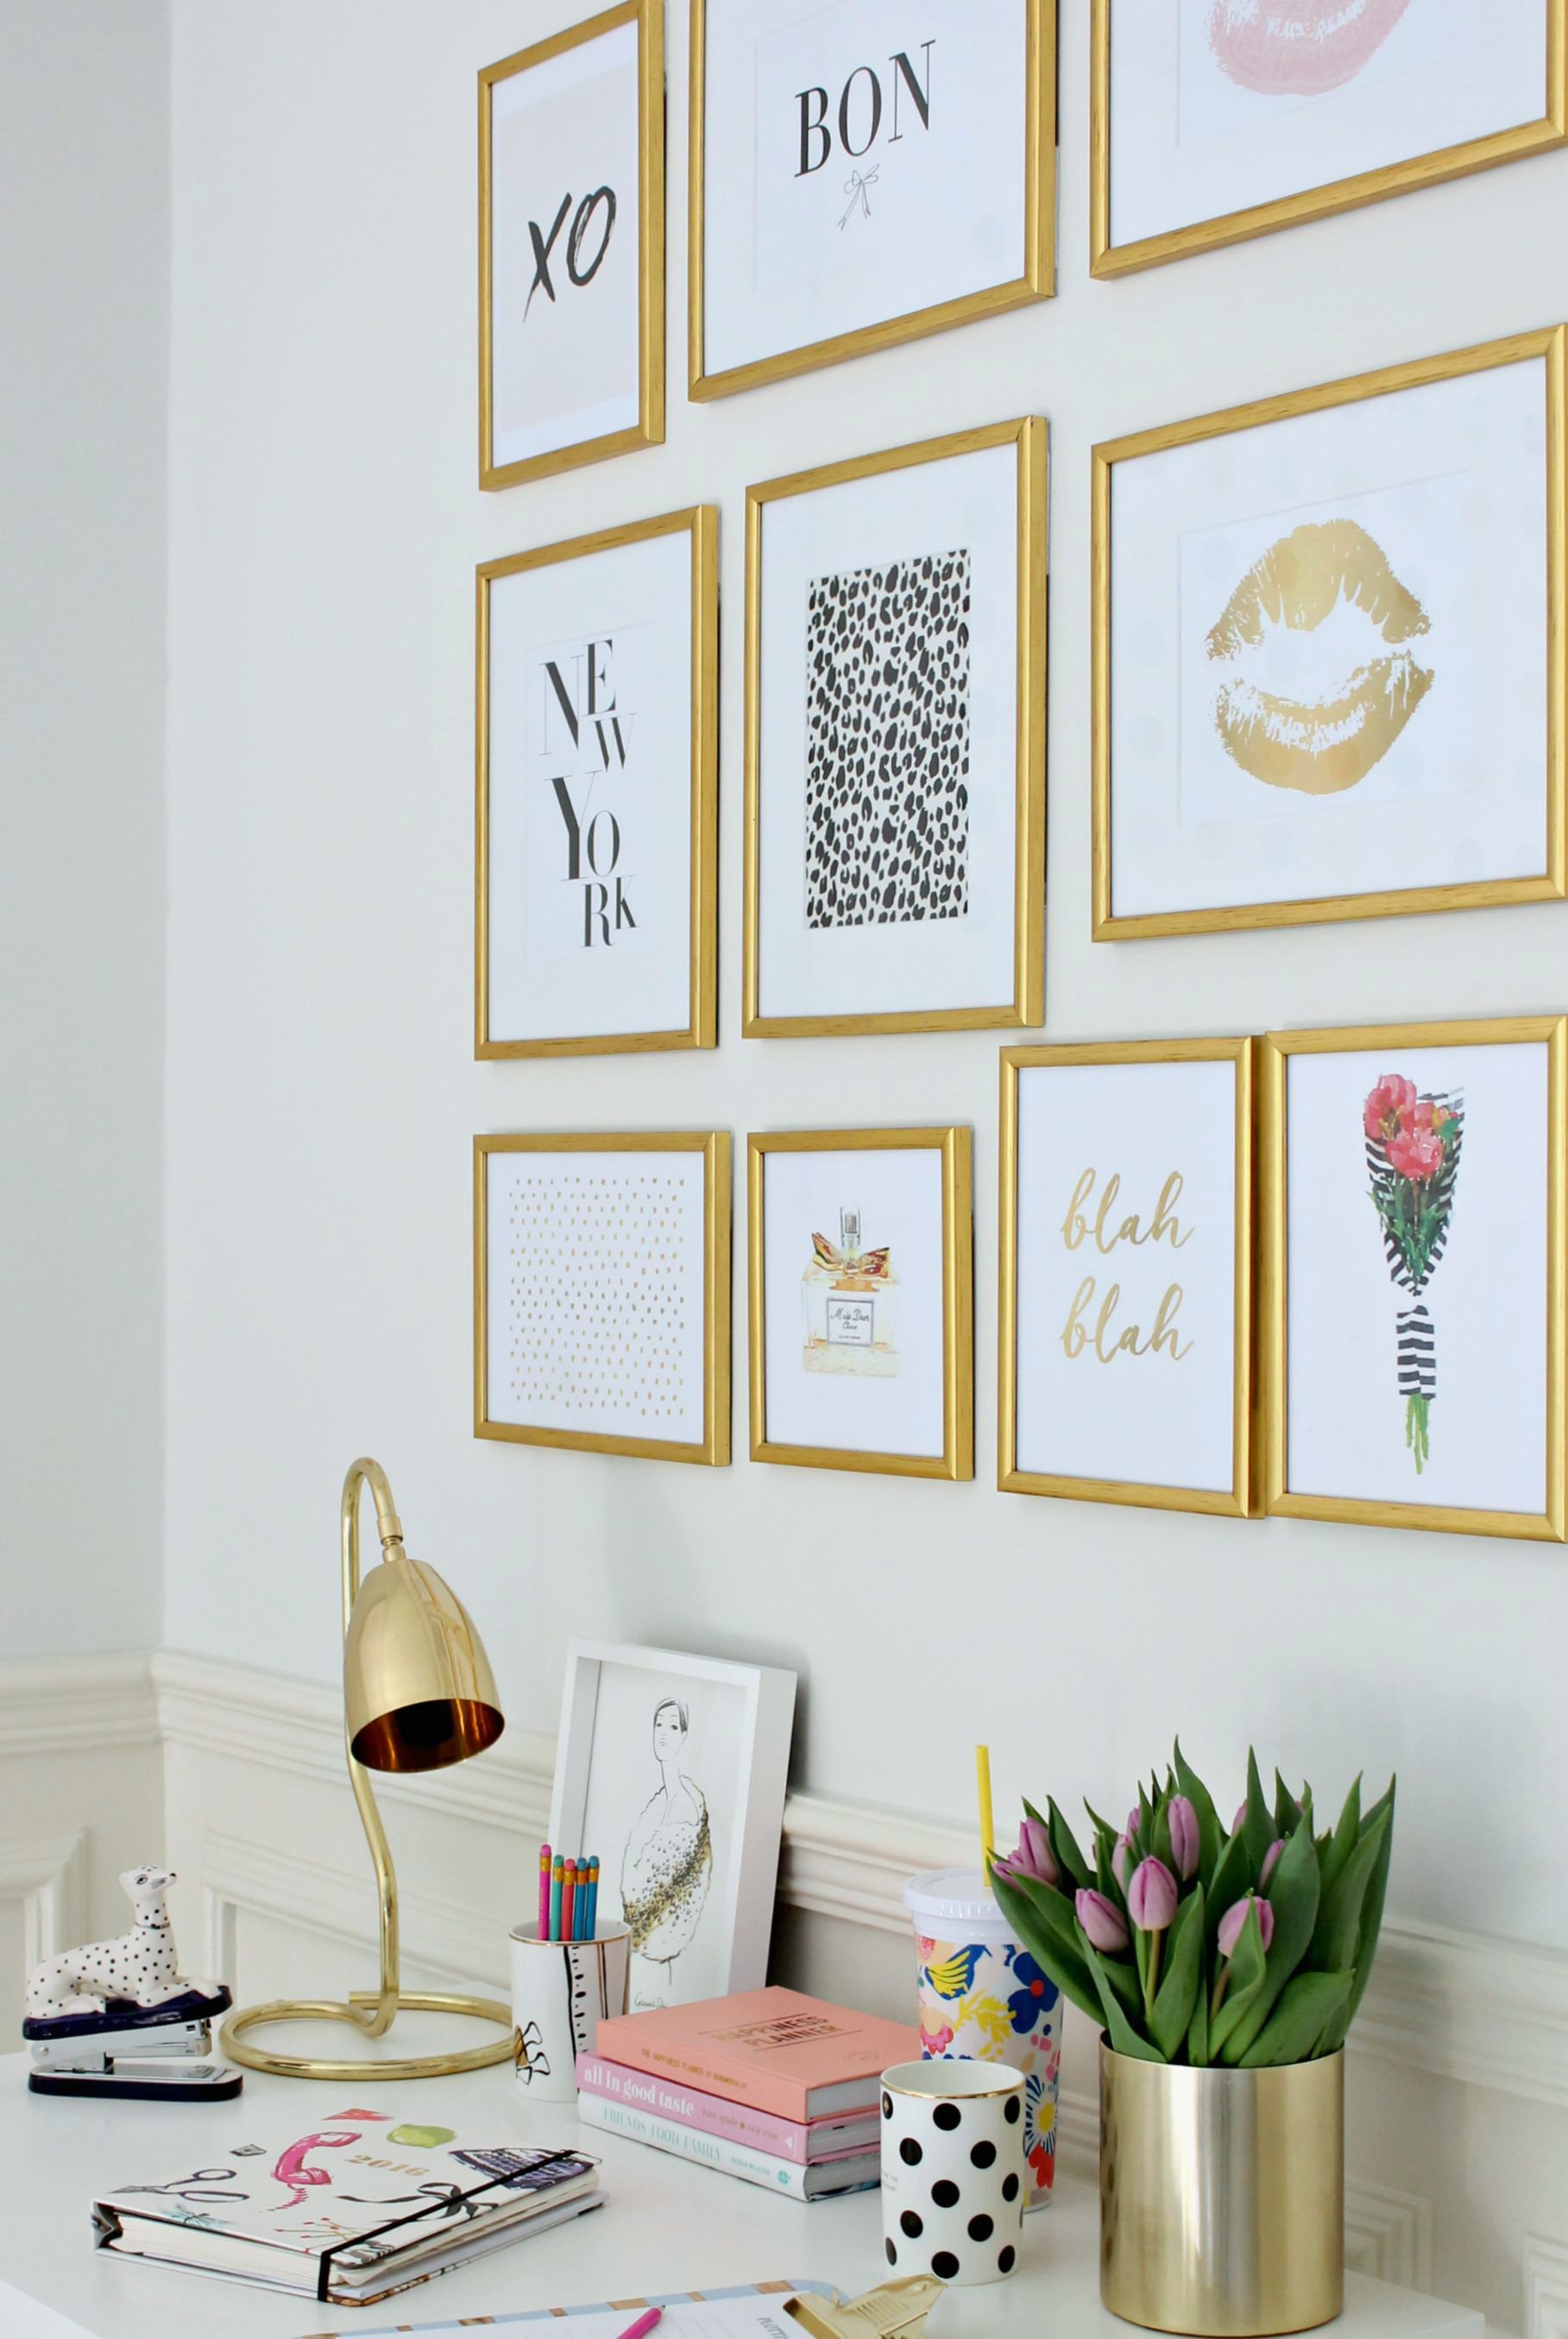 I can’t believe I have managed to create this DIY in such a short period of time.
Do you like the new look? I wanted to create a space that was feminine, glamorous and inspiring.
When I decided to this DIY project, I already knew in my mind that I wanted to use gold frames. These are actually plastic frames painted with gold paint. I picked plastic frames as I wanted them to be as light as possible. However, as mentioned earlier, you can use heavier frames too, as the wall strips are able to withstand different weights as stated on the package.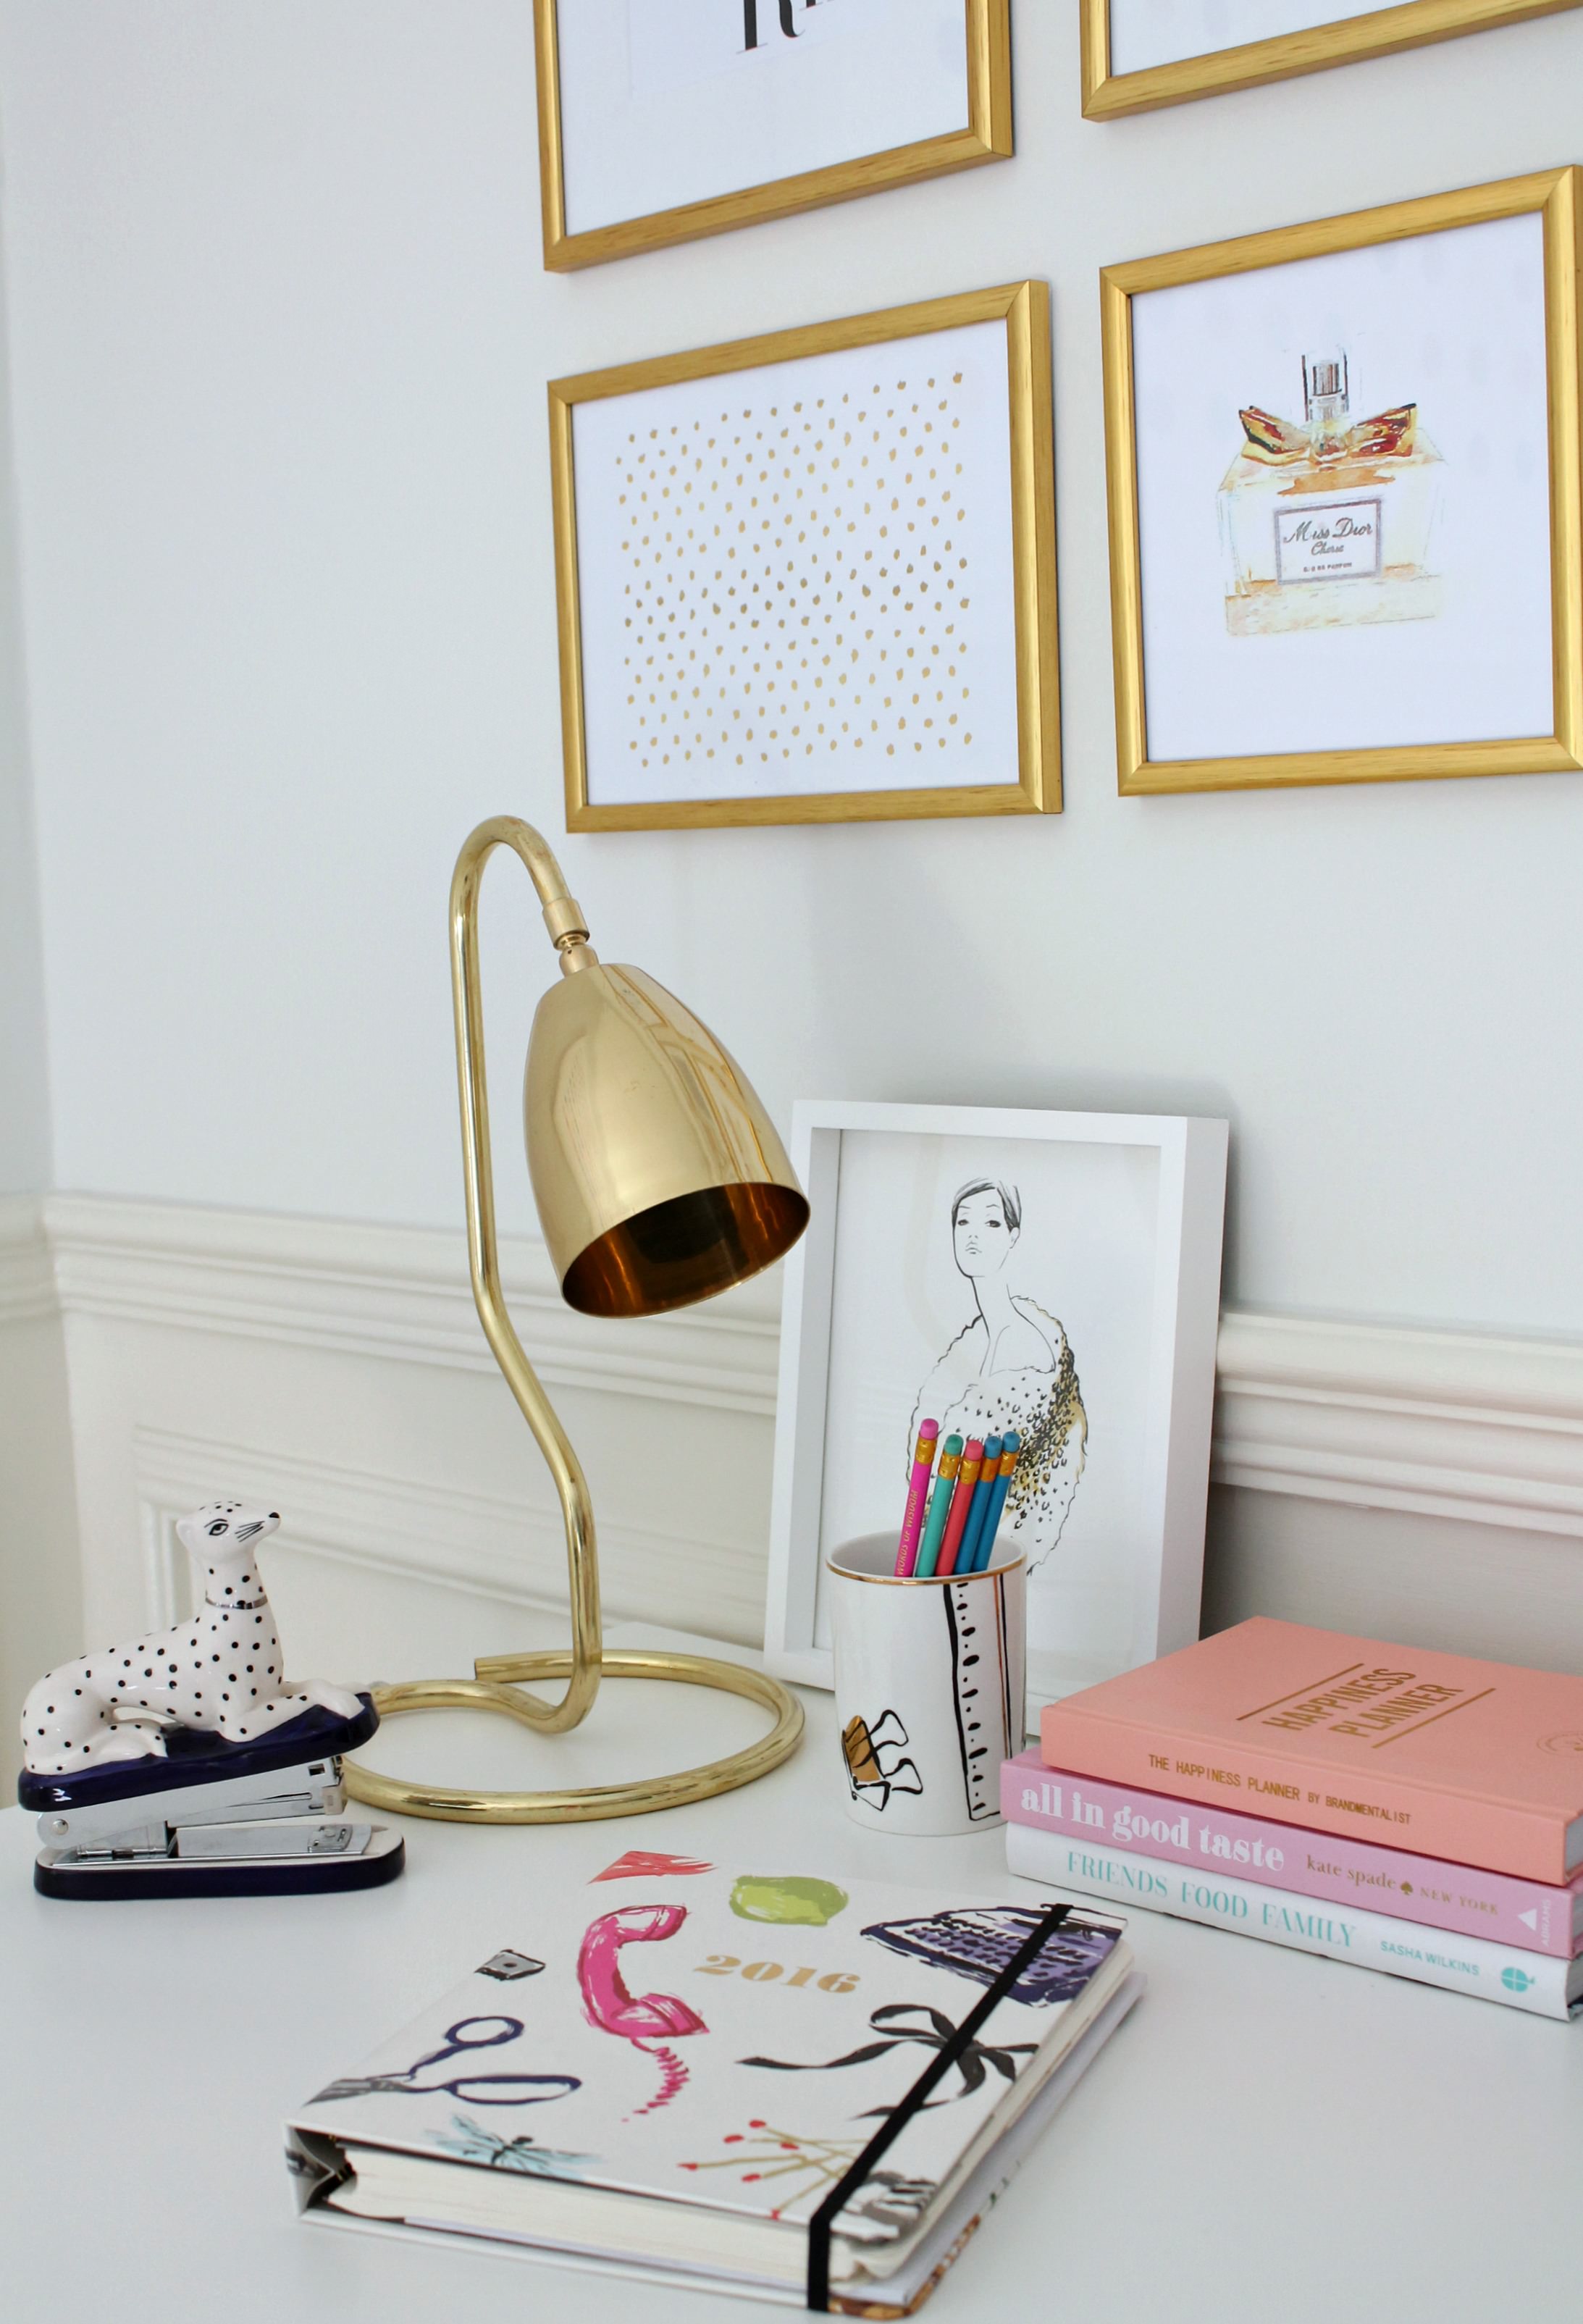 On the desk are a few new colourful desk accessories with hints of gold to match the frames of the gallery wall.
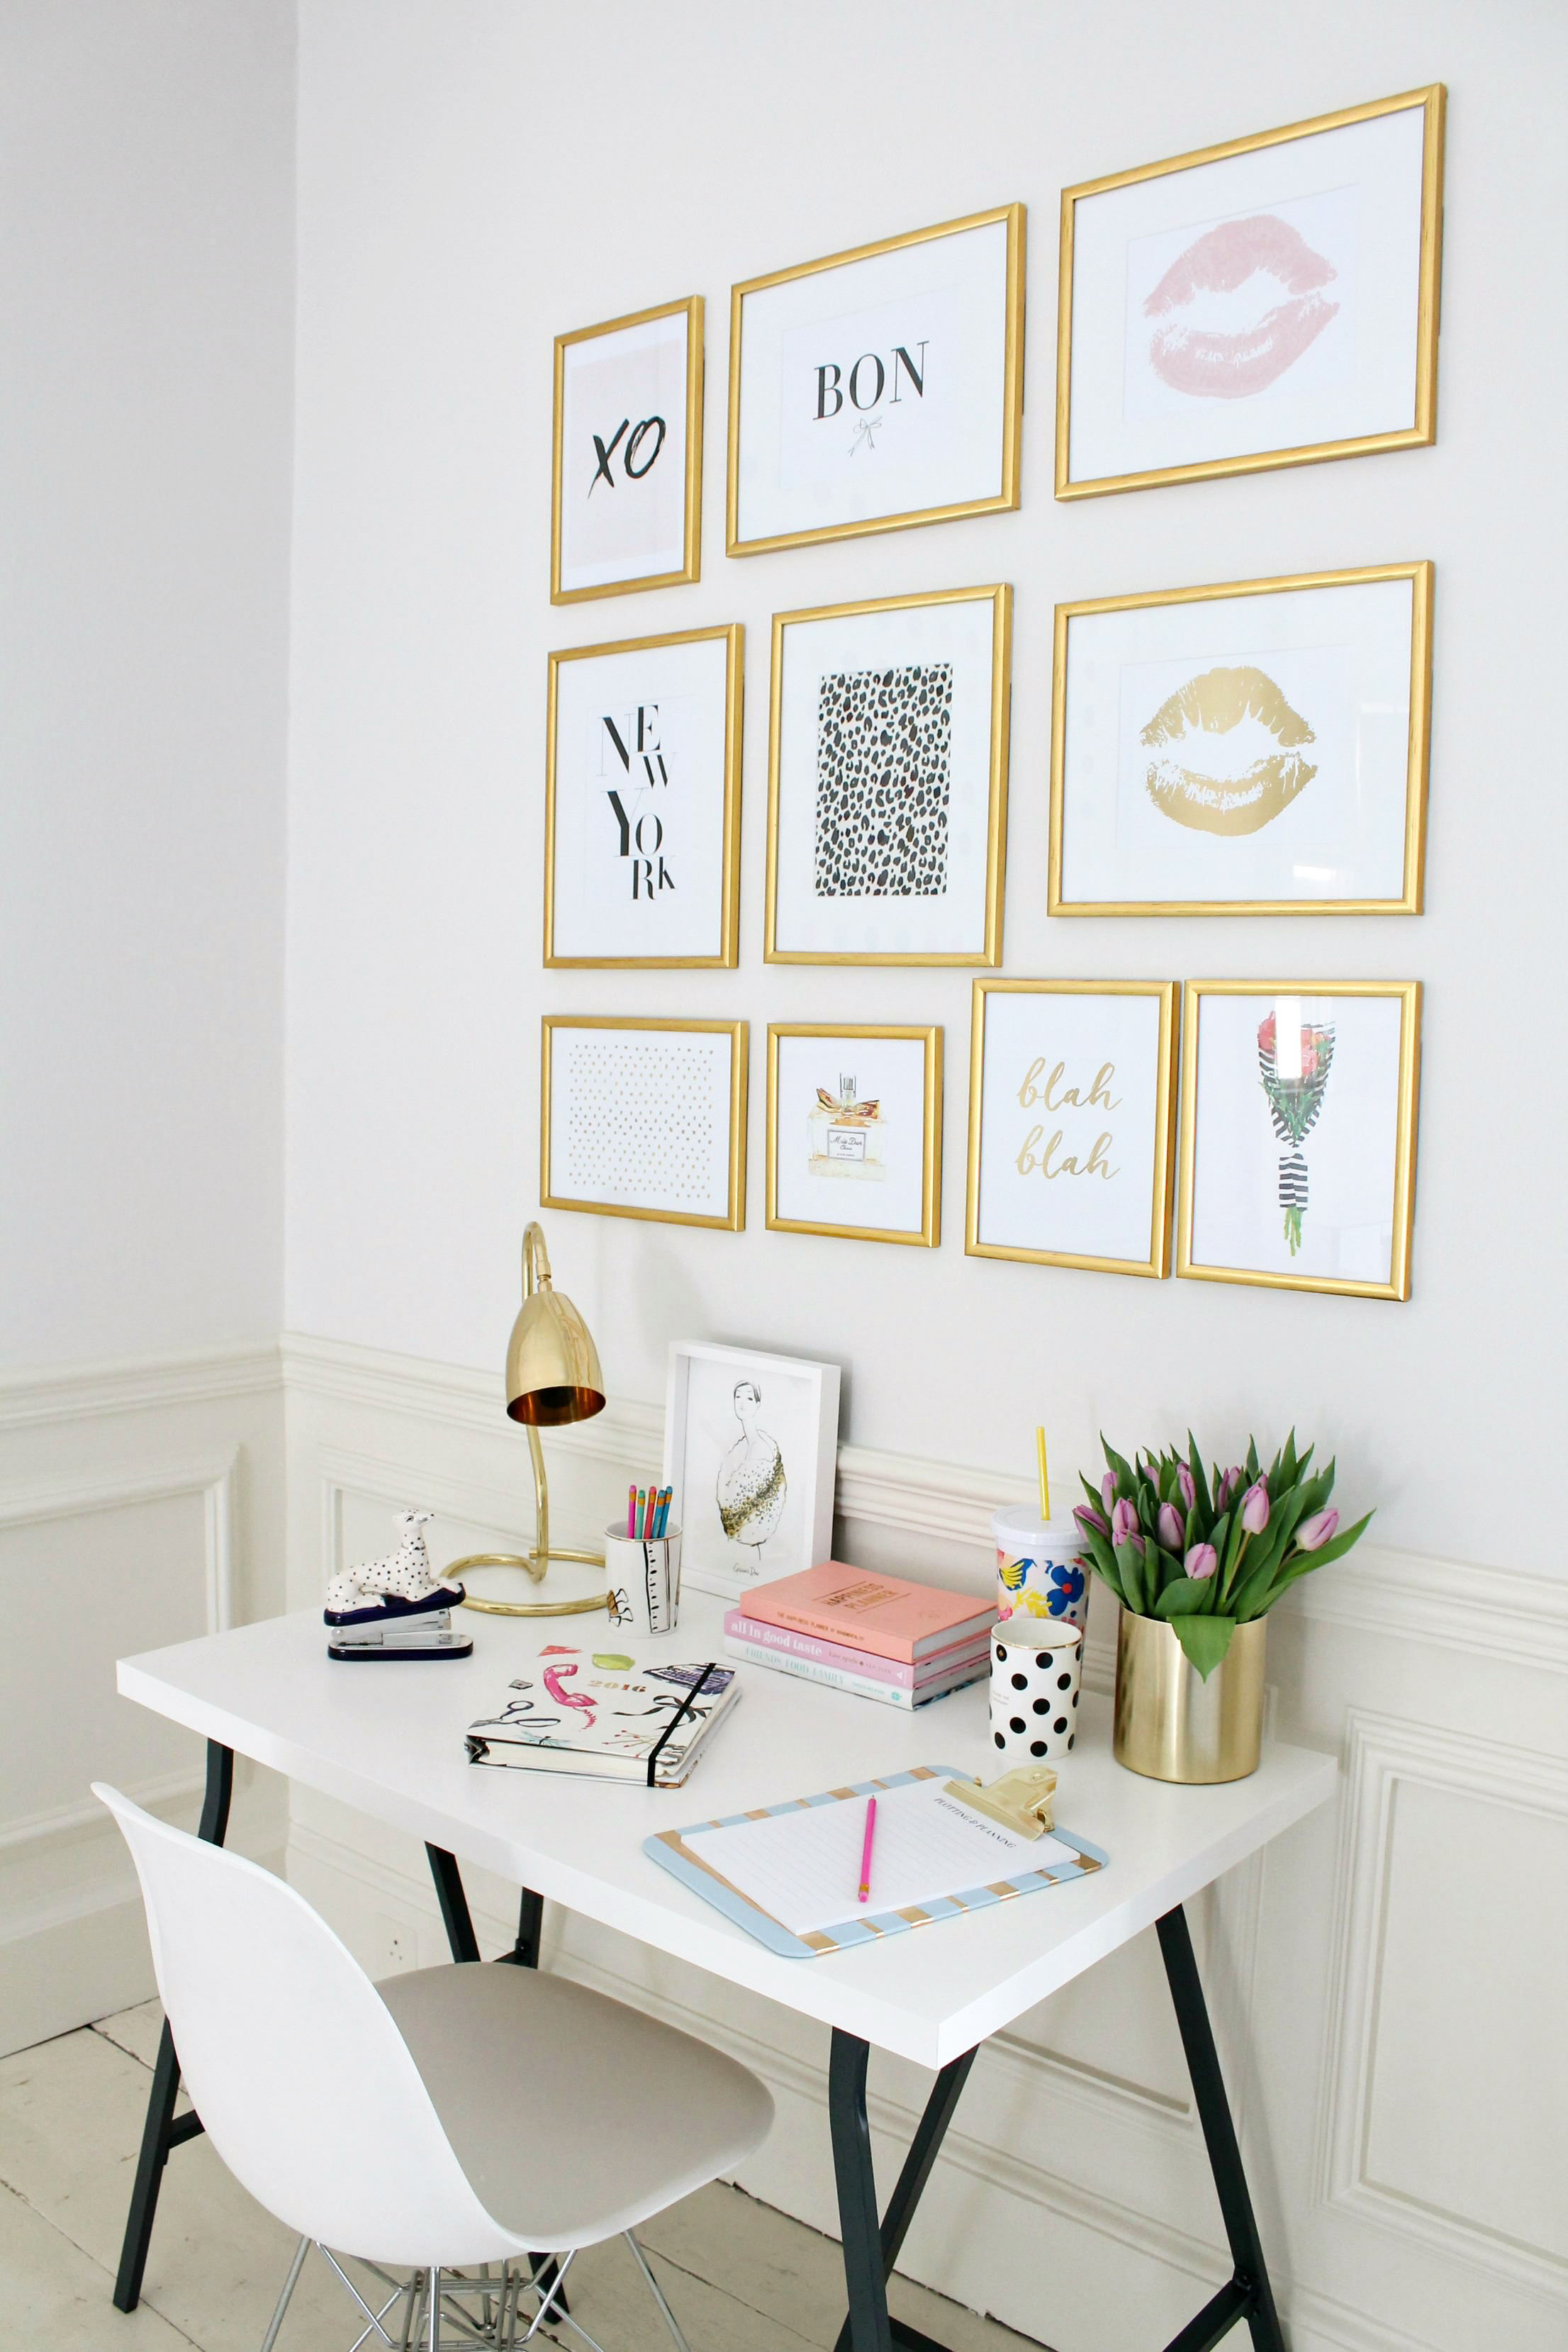 The desk is from Ikea. It is light and portable.
In fact, this corner can easily be converted into a seating area, just remove the desk and add a comfortable velvet couch. I might just do that at home and show you soon. The chair is by Eames.
Add some colourful flowers in a shiny vase and the look is complete.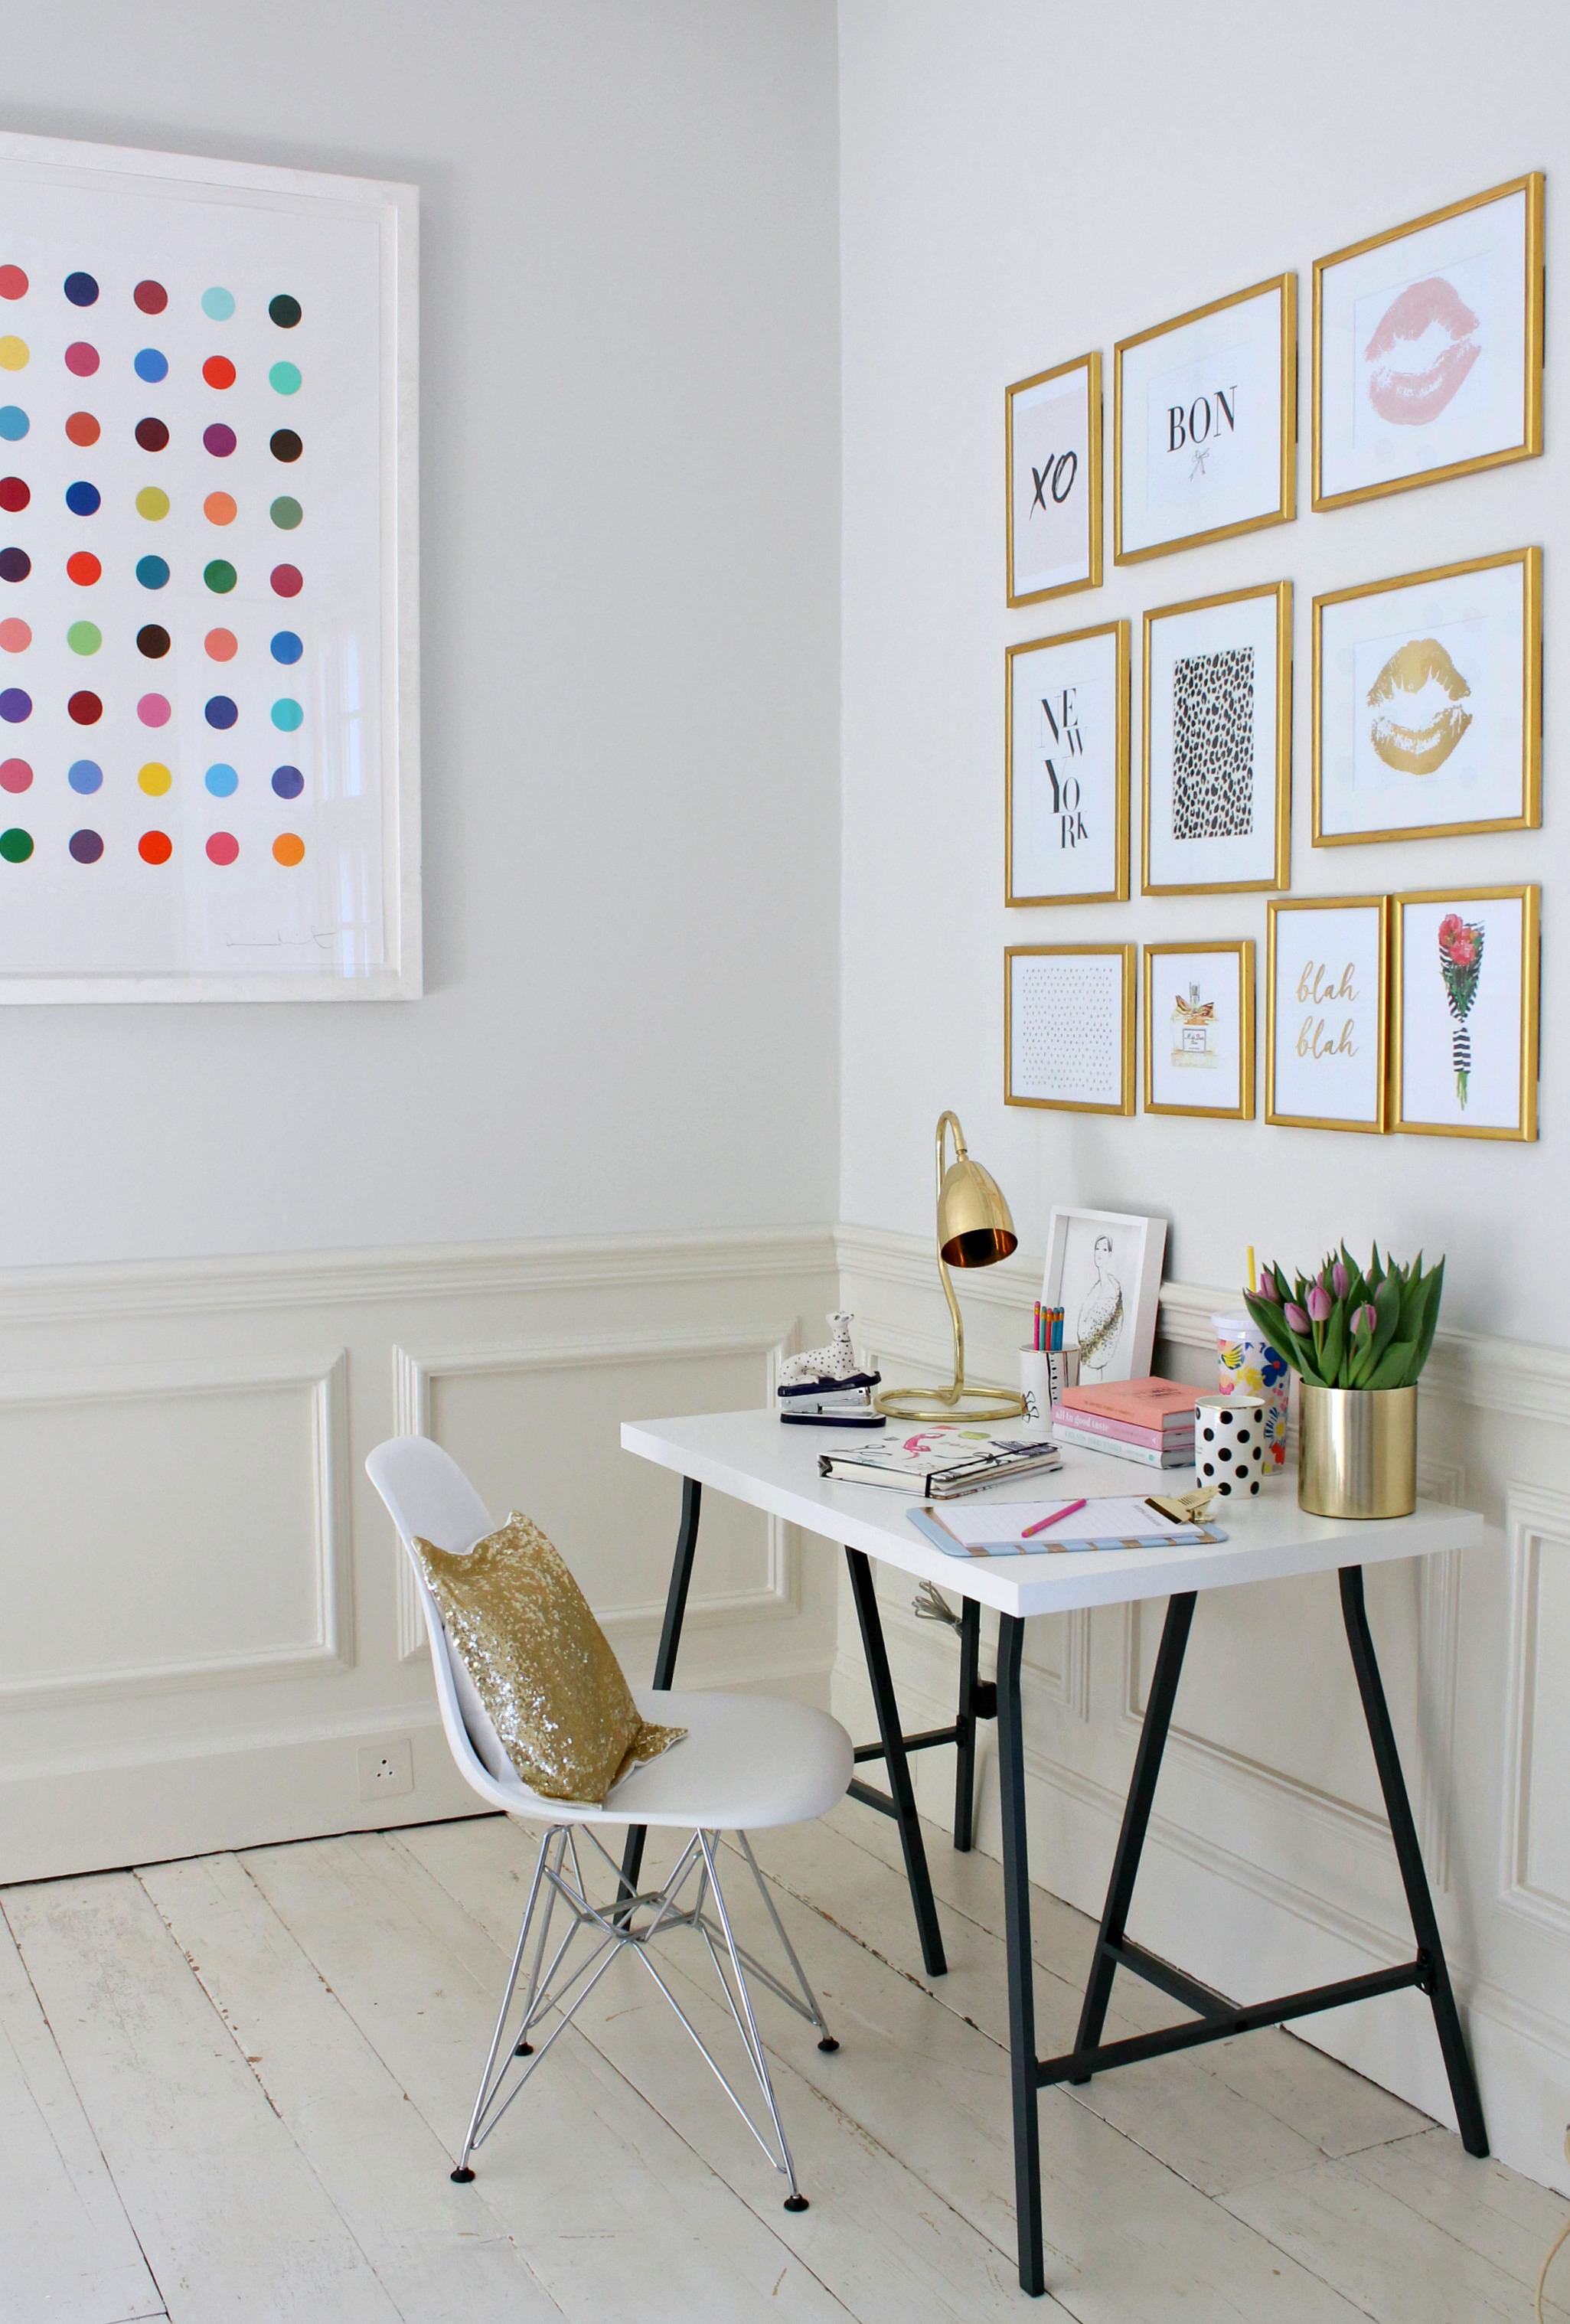 A cute little work area and fits in perfectly well with that colourful Damien Hirst print.
Now, remember I stated at the start that you could WIN the exact same collection of prints above the desk and a set of Command hanging strips?
All you have to do is comment on the blog, tell me how you would use Command picture hanging strips to decorate a look in your room. Winner will be announced here on 3rd April 2016 and contacted via email. Good luck.
Hope you have enjoyed the post. I am so looking forward to showing you the other projects that I have created soon.
( All photography and styling are by Geraldine Tan, Editor of Little Big Bell. This post is a sponsored collaboration with 3M Command brand in the UK. All opinions are my own).

This is so beautiful Geraldine – definitely going to reread this when we do our wall…currently have a load of framed pictures waiting to go up because I can’t quite get my head around how to put them all together! Thanksfor the inspiration as always:)
You are so welcome Abbie. I am so pleased you like it. Have a great week. x
Hanging picture strips are a brilliant idea. Love the look of your work place, colours look very calming and fresh. The picture frames would also look good in pastle colours.
That’s such a great idea Linda, love pastels too. x
Lovely styling. And the colour palette is perfect for that space. These command strips look great. I really have to invest in some as i’m constantly moving art around and having to fill walls. I’ve also got so many friends that rent and hate not being able to hang pictures. I shall be passing this post onto them!!x
Thank you Karen. It’s such a great invention isn’t it? I’m happy to see the back of hammer and nails. xx
It looks fantastic and you have made it seem so easy. I have a wall of pictures that are all hung with old fashioned picture hooks and there are two more to hang which we have been putting of for ages as it’s so tricky that way. Am off to buy some tape – I can have them on the wall by lunchtime. Thanks for the tip. XK
Thank you and you are so welcome Kate. x
I have so many mini quilts and fabric hangings that I would love to use the Command Hanging Strips for in my sewing room. I think it would transform my creative space! Thanks for the giveaway opportunity!
Sounds great Moira, good luck in the draw. x
Wow I really love this space that you’ve created Geraldine. It’s perfect. This is such a brilliant and much needed idea! I am terrible with DIY skills. I love the fact that it’s so neat and tidy. I have a long awaited space for a gallery wall in my home, but it’s still a blank space because I can never hang pictures straight! Thanks for sharing dearest. Have a lovely day x
You are welcome Rasheda. Good luck in the giveaway. x
I’ve been wanting to try this- I think the issue for me is some of my pictures are perhaps too heavy. Will need to figure out what to do- maybe more hooks
Hi Sue, the strips can take heavier weights too. You should try them.
That is so clever. I love that you painted the frames gold too, such a thrifty but glamorous look. I would love to try them out to create a family gallery in the hallway. I have been putting it off forever because I hate messing around with nails. I prefer to use my eye to a spirit level too!
Thanks Penny. x
Wow, amazing what you can do with such tiny strips! The gallery style wall looks fabulous.
Thanks Rachel. x
I’m about to graduate so I would print off lots of my favourite instagram photos from my 6 years of medical school, frame them and then create a display using the strips! So many happy memories.
Sounds wonderful Camilla. Good luck in the giveaway. x
I love everything about this! Please come and style my home office! X
Thank you Jade. I love styling home offices, I think I’ve found myself a new niche. 😉 x
I would LOVE to win these prints!! We are moving into our first owned home in May and I’m dreaming of my perfect office, exactly like this!! Plus I already use and love Commamd strips – having lived in rented flats in London for 5 years they are a life saver!!
Good luck in the draw. x
We have recently moved into a rented home after years of owning, and we have an abundance of white cottage-wonky wall space that’s begging for some nail-free artwork… if only we had command strips and some prints to hang…
Good luck in the giveaway Tori. x
I’m a big fan of 3M ( I used to be their Ambassador as well) and use their products all the time. I wouldn’t be without their velcro stripes in my kit as they are perfect for location houses. I also love what you have done with the display, such a natural stylist Geraldine xx
Thank you so much Pippa. I am not surprised that you used to be their ambassador too. Hope to see you again soon. xx
Oh my goodness that is so inspiring! I would love to try that in my office. I think it would also be fun to hand stuff from the ceiling using the 3m hooks!!! Thanks for being so inspiring
You are so welcome Michelle. xx
3M products are so clever! I am a fan since using command strips and hooks for a party styling project last year. Beautiful effect with the gold frames and I love the desk arrangement too x
Thank you Antonia. I’m definitely a huge fan of 3M products now too. If only I had known about them earlier. Definitely saying goodbye to holes in walls now. x
I love the gold accents in your design! I’d really like to create a family gallery wall in my hallway using your technique xx
Sounds like a lovely project. Good luck in the draw Jo.
As a renter, command strips are ESSENTIAL so I’m not putting holes all over my walls! These prints are absolutely adorable, and would totally transform my home office. There is something so sad about bare walls, right?! And I’m totally drooling over those gold frames – so stunning!
Thank you Lindsey. Good luck in the draw. x
How would I use the 3M strips? Exactly the way you have done so creatively, to hang some gorgeous prints! I am just about to move into my first (rented) flat with my boyfriend and these would be perfect – a way to add a touch of personality to the space without banging holes in the wall… which we aren’t allowed to do.
I have been researching stylish workspaces and looking for a table just like that one (so looks like I’ll be making a trip to Ikea this weekend!)
Thanks for the inspiration, I’ll be checking back for more DiY and home styling posts soon x
I’m so pleased you found this post useful Leah. Good luck in the giveaway. x
Oh my wow – these are amazing – they have rescued our vary bare basement dilemma. We dug under our house but the walls have been sealed with a waterproofing which means we can hammer any nails into the walls – which means we can’t hang pictures… UNTIL NOW !!! these are amazing and I am looking forward to decorating the basement with a gallery wall of photos and prints . Top tip. Thanks
Hi Fiona, I’m in the same situation too with the basement.I can’t wait to decorate it now too.
Great post. Always wondered whether these strips would hold up. I have been collecting photos, artwork and even cute cards to create a gallery wall for my daughter’s nursery. She’s now 7 months so it’s really time I get moving and frame these and hang them up so that she has a lovely and inspiring wall to look at.
Rachael, I was apprehensive until I tried it. It really is amazing. The key is to ensure you leave the strips for an an hour before use and ensure the weight limits are followed.
I’ve been slowly building up a collection of framed art for a gallery wall in my bedroom! Love your version and Command strips are a great solution! Thanks 🙂
You are welcome Claire. x
I am so excited for the chance to win this giveaway..I just started to redecorate my bedroom and I purchased a similar desk and have been looking for prints to add interest to the blank space above the desk..I already use Command Strips throughout the house and have helped my sister hang several things as well..fingers crossed..good luck everyone..xx
Such a lovely space! Love those frames…
thanks Ari. x
Your home is so gorgeous! It literally gives me so much inspiration. I’ve started a similar, fashion themed wall in my bedroom, so hanging strips sound like a great way to expand this, as I’m awful with a hammer and nails.
Love the metallic touches teamed with the graphic prints, a very inspiring work space!
My house is practically held together with command strips. Such a genius idea. My favourite use for them is to hold my boys’ clipboards on their bedroom walls. Because they’re lightweight, they stay up really well and the kiddos can then clip whatever they want to them. Living art 🙂
Love love love. I really want to try and do a wall with various prints and this is just perfect for my room.
good luck in the draw Lorraine. 🙂
I’ve recently moved into my first flat and have just finished decorating – lots of bare white walls which I can’t wait to fill with some great art. These prints are gorgeous and would really bring my home to life! And now that I’ve spent so long sanding and painting, I’m so reluctant to mess up my walls by banging nails in, so these strips seem like a fantastic alternative. I can’t wait to get my hands on some. Thanks so much for the tip and I’d love to be entered into the draw!
Command strips sound amazing for a rented place!
I’d want to use them to put up a gallery wall of mine and my partner’s family photos 🙂 New home, old memories! X
Sounds great Rebecca. good luck in the draw. 🙂
We have just bought our first family home and my little girl can finally have a room of her own, I’d use them to create a great gallery wall in her nursery. They are so fun and she’d never hurt herself on nails.
Have fun with the decorating in your new home Gem 🙂
I love what you did here. Using the strips too?! Genius. I have been known to rearrange rooms (sometimes the whole house) while my husband is at work!! The strips would be perfect to add finishing touches to rooms and then easily removed when I decide to move things around! I’m wondering if they would hold plates for a display too?
Hi Rebecca, I’m like you with the room rearranging. The strips hold up particular weights. I guess as long as the plates are not heavy, but I wouldn’t advise big, heavy valuable plates. 🙂
I would decorate my studio with all the projects i produced while attending architecture school along with the medium i used to draw/paint them. Rules, watercolors, different texture papers all together making a collage of my work which should inspire me to move forward and endure every day. 🙂
Sounds amazing Louret. Good luck with the draw.
Oh my gosh! I have a gallery wall in my study that I hung with nails, but due to the unique size/shape of some of the frames I had to get creative with how I rigged them with wire. Even after all of that, half of the frames don’t lay flat against the wall. These command strips are the perfect solution! Going to get some ASAP!
Sounds like you do need the strips Bethany. good luck with the giveaway draw. 🙂
Where did you find the frames?
Hi Emily, they are just plain black frames that I painted gold.
Your gallery wall looks amazing! Love the gold. Did you spray paint the frames?
thank you Marie, yes I spray painted the frames 😉
Pingback: Hang a canvas on a wall without hammer and nails |
Loved this look! I’m trying to recreate this for my dorm room. Where did you get the frames from??
Hi Navaz, I actually painted the frames with gold paint. You could get similar from Ikea 🙂
Pingback: Halloween ghost DIY for your trick and treating party |
Pingback: Beautiful Gold Accents To Decorate Your Home - Kisses for Breakfast